Showing posts with label Pressure canning recipe. Show all posts

Saturday, January 31, 2015

Leftover Turkey Chili/Soup Recipe

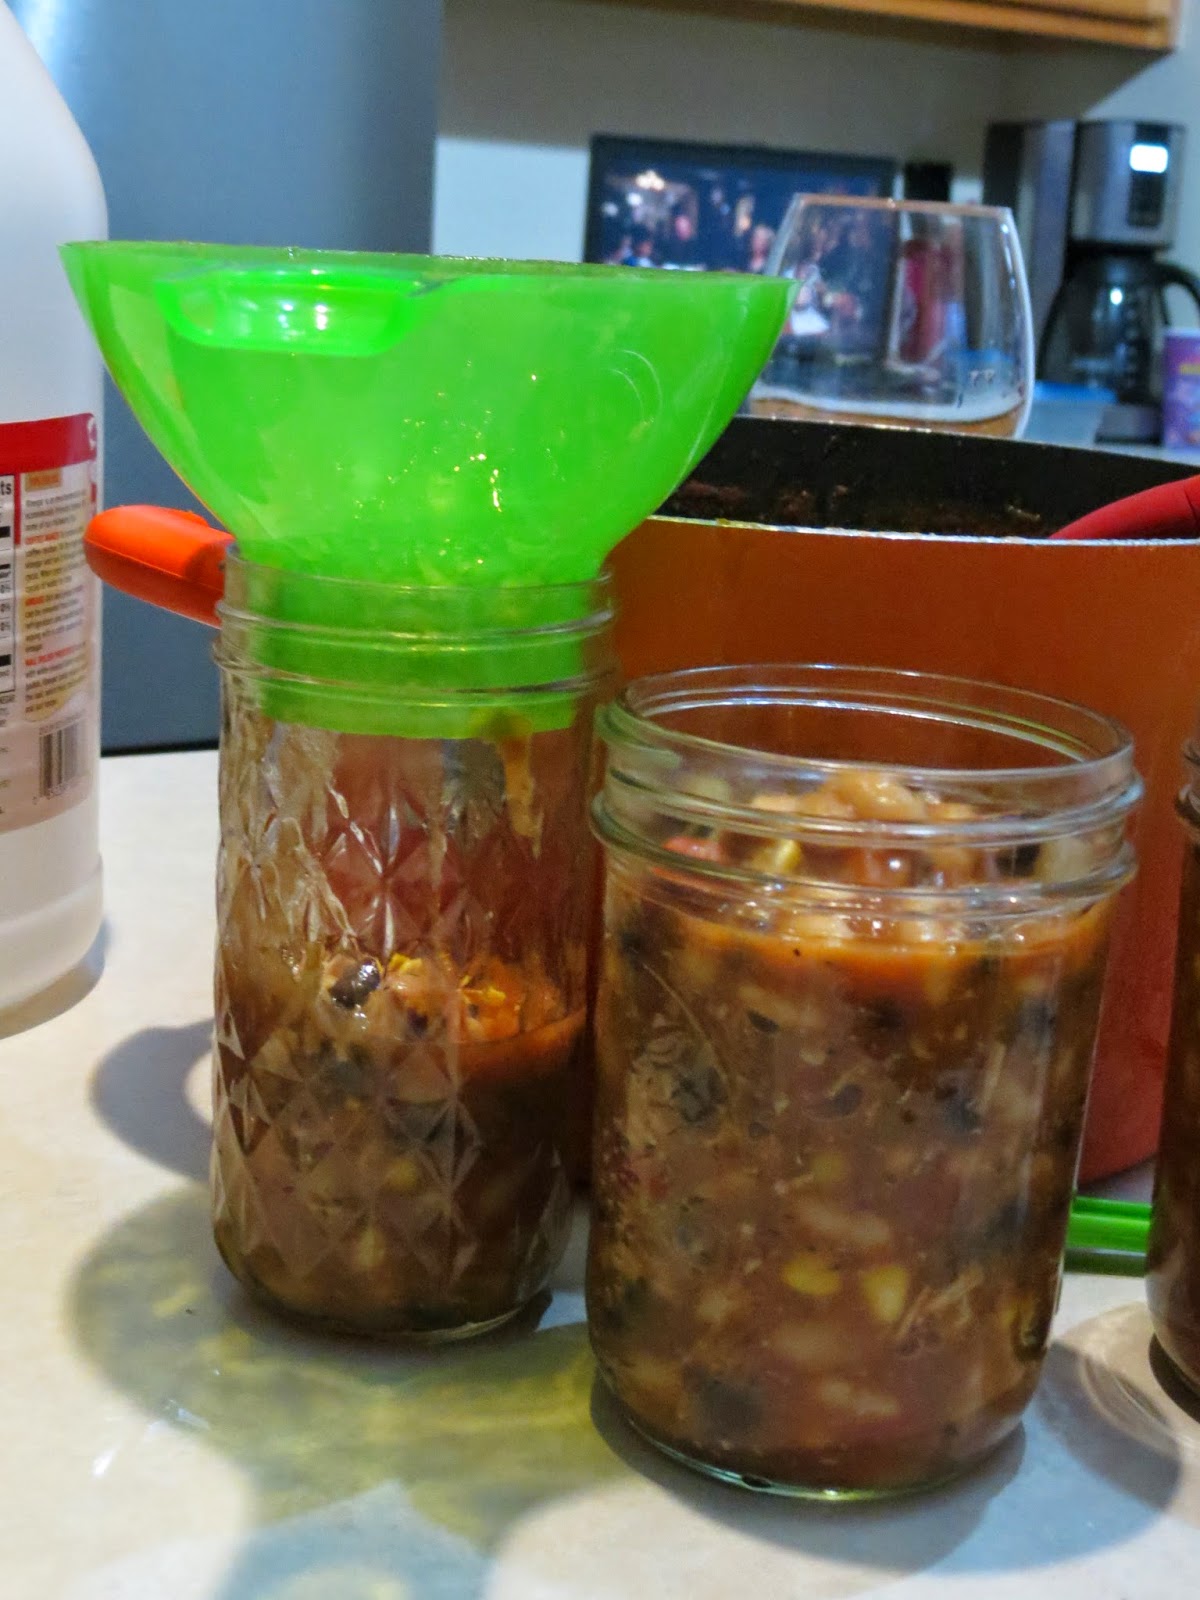
We had so much leftover turkey after Thanksgiving and Christmas I didn't know what to do with myself. I froze a bunch of it in large containers until I had time to do some canning (post-holidays). I made a big batch of turkey chili, of turkey soup and made a lot of turkey sandwiches. I decided to get a little creative and mix it up by combining a chili/soup recipe. This recipe is pretty flexible to adjust to your families preferences.  You can switch out most of the ingredients (different beans, different veggies ect). We served this with cornbread, and used some of it in our enchiladas before canning it! Mmm!


Leftover Turkey Chili/Soup

Ingredients

  • 1 chopped white onion
  • 4 garlic cloves, chopped fine or minced garlic
  • 1 cup chopped green pepper
  • 1 tbls olive oil
  • 4 cans diced tomatoes
  • 2 small cans diced green chili peppers
  • 1 cup of corn
  • One 15 oz can white northern beans, drained
  • 1 1/2 (16oz) bags uncooked large red kidney beans
  • 1/2 bag black beans
  • 2-3 Tbsp chili powder (or up to 4 Tbsp if you like it really hot)
  • 1-2 Tbsp ground cumin
  • 1/2 Tbsp dried hot red pepper flakes
  • 2 teaspoons dried oregano
  • 1 Tbsp garlic salt, plus more if desired to taste
  • 1-2 teaspoons course black pepper
  • 3 to 4 cups of shredded, cooked turkey meat with juices (or additional chicken stalk)


Soup Method
1) In a large pot cook beans "simmering" for about 2 hours. Rinse them and set aside.
2) Saute the onion and green pepper over medium high heat, stirring, until golden, about 5 minutes. Add the garlic, chili powder, cumin, and red pepper flakes and cook, stirring, for a minute or two more. Once onions are soft, add garlic and green chilis. Allow to simmer about 2 minutes.
3) Add tomatoes, corn, seasonings, and cooked turkey meat (and some turkey juices or some turkey stalk of you don't have the juice leftover). Bring mixture to a simmer.
4) Add turkey mixture to the large pt of beans. Add extra water if necessary to keep it juicy. This recipe should be soupy not thick like chili.

Canning Method
1)  Fill your prepared jars with soup leaving about 3/4 inch of head space. Using a plastic spatula remove air bubbles from inside of jars. Wipe the top of your jar with a clean cloth and place the lid & ring on the jars. Place all jars in your (ready to go) pressure canner.
2) Once all your jars are in, put the lid on and exhaust the steam out of your pressure canner for about 10 minutes.
3) Process in pints 1 hour and 15 minutes at 10lbs pressure (change according to your elevation as needed). Process in quarts for 1 1/2 hours

(Shredded cheddar cheese, chopped red onion, sour cream for optional garnish.)

Monday, July 7, 2014

Pressure Canning Pulled Pork

When it comes to Pulled Pork, look for either Pork  Shoulder or Pork Butt (pork butt is actually part of the shoulder, not the butt. The actual butt of the pig is the "ham"). I had to read a lot about pork before committing to buy because I always used to buy center cut pork chops and cook them/shred them. That was really expensive and a lot of work lol. Now I opt for the pork shoulder/pork butt. Bone-in or boneless will work, whichever you prefer. Bone-in shoulders take a little longer to cook, but can make the meat more flavorful and succulent. Boneless cuts can be sliced into smaller chunks for easier handling and quicker cooking. I've done both many times and find bone-in or boneless fairly interchangeable. I usually go for 4 to 6 pounds boneless or 4 to 7 pounds bone-in. This will give you about 10 cups of shredded meat, which is enough to feed a crowd or plenty for a week's worth of meals. Cooking a pork shoulder takes quite a lot of time, so I tend to roast as much as I can at once and pressure can what I don't think I'll use right away for future meals.

Making all that BBQ sauce a couple weeks ago, I thought it'd be a perfect time to make some Pulled Pork Sandwiches. Of  course, I can't just make a small portion I need to make enough to can some! Pulled pork is a summer favorite for most down here in the south, and I technically lie in the south so that is fun to say! Now, I will be able to whip it out with little preparation and have amazing pulled pork sandwiches with homemade BBQ sauce. A dish that would normally take all day to cook you can have ready in minutes after canning it!


Pulled Pork Sandwiches
Yield: 4 pints 1 quart
Ingredients
4lbs Pork Shoulder or Pork Butt

1 Onion sliced
BBQ sauce
**optional** 2 tbls Dry Rub Spice (mixture from BBQ sauce recipe)

(Cooking the Pork)
1) Place the Onion in the bottom of the slow cooker. Top it with your pork and if desired a couple tablespoons of the "Dry Rub Spice Mix" (I gave in my BBQ sauce recipe last week).

2) Turn the crock pot on medium and cook the pork shoulder all day.

3) Once the pork is tender enough, take a fork and start pulling it apart.

4) Add more BBQ sauce until you get the consistency you want for your pulled pork. I mixed my sauce in with the pulled pork but it still seemed a little dry for canning and I wanted my pork to be completely submerged in the sauce so I added some water until I got the consistency I was looking for (I added about 1 cup of water, broth would also work).

5) Bring your meat/sauce mixture to a simmer. You want it to be a little saucy because the canning process absorbs a lot of the liquid.


(Pressure canning process)
1) Prepare your canning jars by boiling them in water and put the lids in simmering water to sterilize and kept them all hot until your ready for them.
2) Ladle the Pulled Pork into your jars, and wipe the rims clean (I always use distilled white vinegar to get all the bacteria and extra grease off before lidding them).
3) Remove the lids from the simmering water using your handy dandy magnetic lid wand, tightening them onto the jars to a fingertip tightness.
4) Processed the pint jars in my pressure canner at 10 pounds of pressure for 70 minutes (90 minutes for quart jars). **Don't forget to adjust cook pressure according to your elevation**.
5) After processing, I removed the canner from the heat and let it cool, and allowing the pressure to drop naturally. 
6)  Removed the jars from the canner using your handy dandy jar lifter and set them on a folded dish towel on the counter to cool. I love to sit and listen for the PING of each successfully sealed jar.

Real BBQ anytime you want it :)

Sunday, June 8, 2014

Pressure Canning Whole Beans - recipe

If you have ever been interested in wanting to try pressure canning, beans are a good place to start! They are so easy. Buying dry beans is much cheaper than buying canned beans, and by canning them yourself you get the best of both worlds, convenience and money savings!

After you have all of your supplies ready, it's time to get the pinto beans ready. 

Canning BEANS!


1) Wash your bean. Sometimes beans have small rocks in them so I sort them in a colander or strainer, this is a good time to give them a good rinse while your at it.
2) Clean and sterilize your cans and lids.
3) For preparing your beans you have 2 options.
 1) Place dry beans or peas in a large pot and cover with water. Soak 12 to 18 hours in a cool place. Then drain. OR you can

2) Cover beans with boiling water in a saucepan. Boil 2 minutes, remove from heat and soak 1 hour. Then drain.
**Then cover beans soaked by either method with fresh water and boil 30 minutes.**4) For pints use 3/4 cup of beans and 1/2 tsp of salt. For quarts use 1 1/4 cups of dry beans and 1 tsp of salt.
5) Fill the rest of the jar with water leaving about 3/4 inch of head space. Wipe the top of your jar with a clean cloth and place the lid & ring on the jars.
6) Process at 10 pounds pressure - Pints 75 minutes and Quarts 90 minutes. (For processing above 1,000 feet altitude adjust your times as necessary). Allow the canner to cool naturally.  


Do not rush the cooling process as beans have protein.  You should never rush a canner to cool quickly especially when canning proteins.
**Stay tuned - next week we will make and can homemade refried beans!**

Monday, May 5, 2014

White Chicken Chili- Pressure Canning Recipe

My first recipe post and I am so excited about this one, it is a favorite in my house. First let's talk a little about the reason we need to use a pressure canner and not a water bath. When I first got started with canning, I had no idea what the difference was, and why it was SO important to know. Canning any low acid foods (all unpickled vegetables, vegetable stocks, meats, beans ect) require a pressure canner The reason for that is that although botulism bacteria is killed at the temperature of boiling water, botulism spores can survive that temperature. The spores can be eliminated by temperatures hotter than boiling water, which requires a pressure canner, or by creating an extreme pH (pickling).
All acidic foods - fruits, pickled vegetables, sugar preserves, and tomatoes with a little added acidity (lemon juice, vinegar, or citric acid) - may be safely processed in a boiling water bath.

So today I am pressure canning white chicken chili. It is simple to make, and delicious!

Ingredients
1 tbls extra virgin olive oil
2 chopped bell peppers (I used one red and 1 green for color variety)
3 heaping tablespoons of minced garlic
1 can diced tomatoes (or equivalent of fresh diced tomatoes)
1 7oz can of green chilis
3 to 6 tablespoons chili powder
2 tablespoons cumin
2 teaspoons oregano
16 oz of chicken broth (can or box)
3 cups of water
1/2 -1 cup of corn (your preference how much your family likes corn)
3 decent sized chicken breasts (boil simmering in about 2 inches of water and some Cumin and chili powder until you can easily shred them)
3 cups dried great Northern Beans (or other white variety)
1 cup Black beans, rinsed well.


Directions:
1.) Prepare pressure canner. Heat jars and lids in simmering water until ready for use. Do not boil. Set bands aside.
2.) Heat extra virgin olive oil with onions and garlic, cook until soft.
3) Add remaining ingredients. Bring to a boil. Reduce heat and simmer for 30-45 minutes, stirring occasionally.
4.) Ladle hot chili into hot jars leaving 1 inch headspace. Remove air bubbles. Wipe rim. Center hot lid on jar. Apply band and adjust until fit is fingertip tight.
5.) Process filled jars in a pressure canner at 10 pounds pressure 1 hour and 30 minutes for pints, adjusting for altitude.
6) Remove jars and cool. Check lids for seal after 24 hours. Lid should not flex up and down when center is pressed.